Due to its many templates and simple layout, Wix may be a good fit for small enterprises. Wix makes website creation easy. As your business expands and restrictions become apparent, you should transfer from Wix to WordPress CMS for more control. Knowing both CMS platforms’ global market share can help if you’re on the fence about transferring.
Migrating begins with proper planning. How big is your site? Are all your photos and SEO settings necessary? You can also compare Wix and WordPress’s main differences to learn more. This post will show you how to transfer your Wix site to WordPress using reliable methods.
Table of Contents
Why Switch from Wix to WordPress?
Wix To WordPress migration offers pros and cons based on your needs. There are reasons to convert from Wix to WordPress, such as:
- WordPress lets you modify your site to your vision. You can customize the theme, code, plugins, and settings. You may immediately access your site’s files and database, unlike Wix.
- WordPress is noted for its fast loading speed and SEO-friendly features. Yoast SEO, All in One SEO, and Rank Math can improve your site for search engines. Caching plugins like WP Rocket, W3 Total Cache, and LiteSpeed Cache help boost site performance.
- Free and open-source WordPress reduces cost and scale. Just pay for web hosting and your domain name. Choose from many hosting plans to fit your budget and needs. WordPress allows easy scaling as your site expands without limits or fees.
- WordPress’s large user and developer community improves the program and creates new themes and plugins. Online forums, blogs, tutorials, and courses can answer your queries, solve your difficulties, and recommend your site. Professional WordPress developers and maintainers can also help here.
Factors To Consider For Transfering From Wix To WordPress
When relocating, your blog may have been the ‘draw’ of your website, but remember to consider other factors. After all, website content is simply one aspect of its strategy. Other considerations include the following:
- Sales landing pages and contact forms are vital.
- Web navigation and structure.
- All videos and photographs on your pages and posts.
The design and style of your website are equally important. You may not be able to match the aesthetic of your old site, but you may find a solution you like (with a process compromise.) Next, a step-by-step guide will help you finish.
Migrate Your Website from Wix.
After learning why you might switch from Wix to WordPress, let’s walk you through it. There are three basic ways to migrate from Wix to WordPress:
- Content import from Wix to WordPress
- Moving using a plugin
- Manually copying and pasting pages
Method 1: Importing Content from Your Wix Account to WordPress

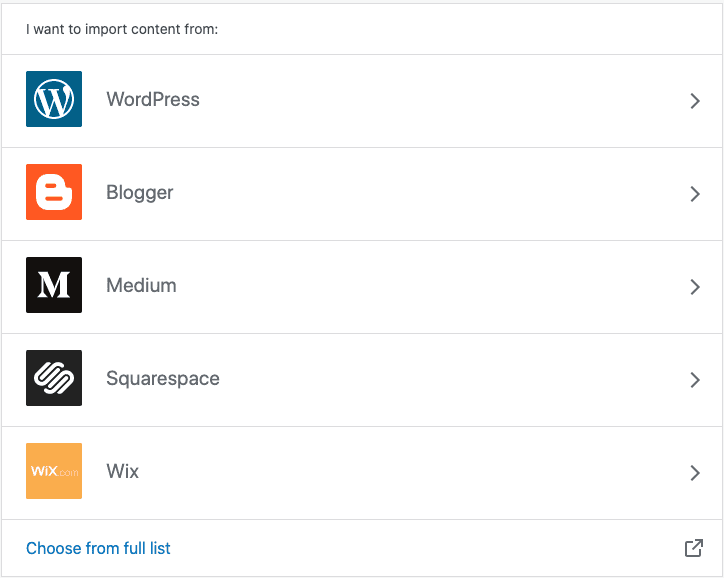
Importing Wix content to WordPress is the first step in migrating your website. This strategy works for sites with mostly blog posts or articles to move to WordPress. It requires exporting your Wix content through an RSS feed and importing it into WordPress. These are the stages for this method:
Step 1: Sign up for a web hosting account.
First, sign up for a web hosting account to install WordPress. WordPress hosting providers include Bluehost, SiteGround, HostGator, and DreamHost. Compare features, costs, and reviews to get the best one for your site.
Step 2: Install WordPress on your web hosting account.
WordPress installation on your web hosting account is next. Most web hosting providers offer one-click installation for quick and easy setup. WordPress can be installed in minutes using your web hosting panel.
Step 3: Find the RSS feed URL of your Wix site.
The final step is finding your Wix site’s RSS feed URL. The RSS feed contains your site’s content in a format other platforms can read. Wix material can be imported into WordPress via RSS feed.
Follow these procedures to find your Wix RSS feed URL:
- Locate the blog page you wish to export on Wix.
- Select View Page Source from the right-click menu.
- Search the source code for “RSS” using Ctrl+F or Command+F.
- Copy the “.xml” URL after “href=.” It should look like this:
https://example.wixsite.com/blog/feed.xml.
Step 4: Import your content from Wix to WordPress.
The fourth step is to import Wix material to WordPress using the RSS feed URL you copied earlier. Do this by following these steps:
- Visit Tools > Import on your WordPress dashboard.
- Select Run Importer under RSS.
- Enter your Wix RSS feed URL, click Upload file, and import.
- Add an author name to imported posts and check Download and import file attachments to import photos.
- Click Submit and let the import finish.
Step 5: Check and edit your imported content.
Check and edit imported WordPress content in the fifth stage. Adjustments and modifications may be needed to make things look and perform properly. You may need to
- Change your article permalinks to match Wix or boost SEO. Go to Settings > Permalinks and select an appropriate alternative.
- Post categories and tags should be updated to categorize them. Go to Posts > Categories or Tags to edit them.
- Fix import errors like broken links and images. Use Broken Link Checker or Media File Renamer plugins for this.
- Add Wix-unimported forms, widgets, social media buttons, etc. WordPress plugins like Contact Form 7, Elementor, and Jetpack can add this functionality.
Method 2: Using a Migration Plugin

Another way to migrate from Wix to WordPress is to use a migration plugin. This works for sites with pages, menus, galleries, and more. These are the stages for this method:
Step 1: Sign up for a web hosting account.
Sign up for a web hosting account to install WordPress. Many web hosting providers offer WordPress hosting, including Bluehost, SiteGround, HostGator, and DreamHost. Compare features, costs, and reviews to get the best one.
Step 2: Install WordPress on your web hosting account.
WordPress installation on your web hosting account is next. As said, most web hosting services offer one-click installation for quick and easy setup. WordPress can be installed in minutes using your web hosting panel.
Step 3: Install and activate a migration plugin.
Install and activate a migration plugin to convert your Wix site to WordPress. CMS2CMS, FG Wix To WordPress Premium, and WP All Import offer this service. Choose the one that fits your demands and budget. To install and activate a migration plugin, follow these steps:
- Select Plugins > Add New from your WordPress dashboard.
- Find the plugin you want and click Install Now.
- After installing, click Activate to activate the plugin.
- Configure the plugin on the options page. Depending on the plugin, your Wix, WordPress, and other site URLs may be required.
Step 4: Run the migration process.
The fourth step is the migration procedure with the installed and active plugin. Depending on your Wix site’s size and complexity, this may take time. Migration progress may be seen on the plugin dashboard. The migration process requires these steps:
- Open the plugin dashboard and click Start Migration.
- Wait for the plugin to scan and convert your Wix site to WordPress.
- Review the results to ensure accuracy.
- Click Finish Migration to finish.
Step 5: Check and edit your migrated site.
Check and edit your migrated WordPress site in the fifth stage. Adjustments and modifications may be needed to make things look and perform properly. Some steps may be similar to Method 1, such as:
- Change your post and page permalinks to match Wix or boost SEO.
- Organize posts and pages by updating categories and tags.
- Link and image breaks from migration should be fixed.
- Forms, widgets, social media buttons, etc., from Wix should be added.
Method 3: Copying and Pasting Each Page Manually
Copying and pasting pages manually is the third way to move from Wix to WordPress. This method is suitable for transferring a few pages or a simple layout to WordPress. It requires establishing WordPress pages and copying and pasting Wix content. These are the stages for this method:
Step 1: Sign up for a web hosting account.
First, sign up for a web hosting account to install WordPress. Many web hosting providers offer WordPress hosting, including Bluehost, SiteGround, HostGator, and DreamHost. Compare features, costs, and reviews to get the best one for your site.
Step 2: Install WordPress on your web hosting account.
WordPress installation on your web hosting account is next. As said, most web hosting services offer one-click installation for quick and easy setup. WordPress can be installed in minutes using your web hosting panel.
Step 3: Create new pages on your WordPress site.
The next step is to construct WordPress pages that match your Wix pages. Create and design pages using the WordPress editor or a page builders plugin like Elementor or Beaver Builder. To build WordPress pages, follow these steps:
- Choose Pages > Add New from your WordPress dashboard.
- Click Publish after entering your page title.
- Repeat for each WordPress page you want to create.
Step 4: Copy and paste the content from your Wix site.
The fourth step is to copy and paste Wix material into WordPress. Paste the content into WordPress’s text, visual editor, or page builder plugin. Content may need formatting, alignment, spacing, and styling changes to look well on WordPress. Follow these procedures to copy and paste Wix content:
- Open the page you wish to replicate on Wix.
- Press Ctrl+A or Command+A to select the entire page.
- Copy the text with Ctrl+C or Command+C.
- Open the page you generated in Step 3 on your WordPress site.
- Press Ctrl+V or Command+V to paste.
- Use WordPress or a page builder plugin to format and edit content.
- Repeat this for each Wix page you want to duplicate.
Step 5: Check and edit your copied content.
Check and edit copied WordPress content in the fifth step. Adjustments and modifications may be needed to make things look and perform properly. Method 1 and Method 2 may require comparable steps, such as
- Changing your page permalinks to match Wix or boosting SEO.
- Update your site’s menu to link to new pages. Go to Appearance > Menus and modify as needed.
- Repair broken links and graphics from copying and pasting.
- Add any forms, widgets, social media buttons, etc., that weren’t copied from Wix.
Steps after Migration
We will walk you through some of the most important actions to optimize and ready your WordPress site for visitors.
Step 1: Check Your Site for Errors.
After transferring from Wix to WordPress, inspect your site for faults and bugs. Common mistakes include
- Broken links that lead to non-existent site pages or resources. Use [Broken Link Checker] to scan and mend broken links on your site.
- Images not migrated from Wix to WordPress or with erroneous URLs are missing. Use [Media File Renamer] to rename and update picture URLs.
- Formatting concerns include fonts, colors, space, alignment, and site layout. Edit and adjust your site’s design with [Elementor].
Step 2: Optimize Your Site for SEO
SEO optimization is the next step after switching from Wix to WordPress. SEO increases your site’s visibility and ranking on Google and Bing. SEO best practices include:
- Install SEO plugin: An SEO plugin optimizes site content and settings for SEO. Yoast SEO is a popular WordPress SEO plugin. Your site can have meta titles, descriptions, keywords, sitemaps, breadcrumbs, and more.
- Choose a quick and dependable hosting company: A hosting provider stores and delivers your site’s files. A quick and trustworthy hosting service can boost your site’s SEO-friendly performance and speed. WordPress hosts like Bluehost, SiteGround, and WP Engine are suggested.
- Use a caching plugin: It builds and stores static versions of your site’s pages, reducing server load and speeding it up. Popular WordPress caching plugins include WP Rocket, W3 Total Cache, and WP Super Cache.
Step 3: Secure Your Site from Threats
The next step after converting from Wix to WordPress is to protect your site from hackers, viruses, spam, etc. Site security is essential for data and reputation protection. Some website security methods are
- SSL installation: SSL certificates encrypt site-to-user communication. It includes a padlock image and a “https” prefix in your site’s URL, indicating security and trustworthiness. SSL certificates can be purchased from your hosting provider or [Let’s Encrypt].
- Install security plugin: Security plugins guard your site from threats. It may block malicious login attempts, scan for malware firewall assaults, back up your site, etc. WordPress security plugins like Wordfence, Sucuri, and iThemes Security are popular.
- Upgrade WordPress core, themes, and plugins: WordPress core, themes, and plugins must be updated for security and bug-free operation. Updates often contain security updates, bug fixes, and new features that improve site performance. You can update WordPress core, themes, and plugins from the dashboard or using [WP-CLI].
Conclusion
Finally, switching from Wix to WordPress can be smart as your website grows and your needs change. WordPress is more customizable and scalable. Each strategy has advantages and fits different situations. After migration, check for faults, enhance SEO, and secure your site. These stages make your new WordPress site functional, optimized, safe, and ready to attract and engage visitors.


