WooCommerce product attributes let you define extra product data, such as size or colour to help customers know more about the product. The default Woocommerce template does have the features to display it in the additional information section but if you are looking to show it just above the cart button then you can use the WooCommerce hook woocommerce_before_add_to_cart_button. This is the best way to show custom product attributes on the shop page programmatically.
Display Custom Products Attributes Dropdown
The following code will work only for simple product or if you are using WooCommerce lottery. To show a list, select or a dropdown for all the custom attributes in the frontend just above the cart button you can add the code to functions.php file of the current theme you are using.
Note: Don’t place the code in the woocommerce plugin folder. It is always advised to place the above code in functions.php of the theme you are using so that the files don’t overwrite when you update WooCommerce plugin.
Adding Custom Attribute to the Backend
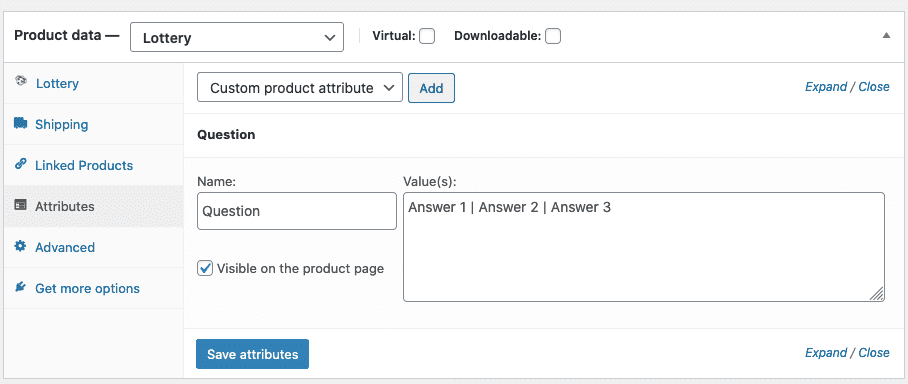
We are using lottery plugin and wanted to show a custom attribute in the frontend. To add a custom attribute, click on the Attributes Tab. Select Custom product attribute and enter the name and the values. The dropdown values have to be separated by | as per the screenshot.
Custom Attribute Select Display
As you can see the list shows all the options that we have added in the backend of the particular product. You can add any number of values in the backend which is shown as an option in the frontend.
Conclusion
Using Custom Attributes at the right place in the product page will definitely help the customers in taking the right decision while purchasing the products. If you have any questions or face issues with the implementation of custom product attributes into your woocommerce page, then feel free to contact us. We will get back to you as soon as possible
This detailed tutorial will help you handle the upgrade process quickly, whether you’re considering upgrading Joomla 3 to 4, or perhaps looking to improve your older Joomla 1.5 to the latest version.
For those wondering how to upgrade Joomla manually, or wishing to update to the latest Joomla version, this article will provide the necessary steps to make the process as smooth as possible.
Upgrading your Joomla version regularly is essential to maintaining a secure, efficient, and feature-rich website. Let’s delve into the step-by-step process of upgrading Joomla using cPanel.
Backup Your Website
Before any major changes to your Joomla website, it’s always prudent to create a backup. This way, should anything go wrong during the upgrade, you can revert to the previous state. You can do this within cPanel using the Backup Wizard or by using Joomla extensions like Akeeba Backup.
Check Extension Compatibility
Before upgrading, make sure your extensions are compatible with the new Joomla version. You can find this information on the Joomla extensions directory or the extension developer’s website. It’s crucial to ensure smooth operation after the upgrade.
Upgrade Your Joomla Version
Once the backup is complete and the extensions are compatible, you can proceed with the upgrade. If you’re using Joomla 3, you can easily upgrade to Joomla 4 from your Joomla control panel.
If you’re using an older version such as Joomla 1.5, the upgrade process might be a bit more complex. You would need to migrate your site to Joomla 2.5 before proceeding with the upgrade to Joomla 3 or 4. Here, you can follow a detailed guide on how to upgrade Joomla 1.7 to 2.5 and subsequently upgrade from Joomla 3 to Joomla 4.
Test Your Website
Once you’ve completed the upgrade, make sure to thoroughly test your website to ensure everything is functioning correctly. If you run into issues, you might need to refer to this guide on fixing Joomla issues.
Update Your Extensions and Templates
After ensuring your website works well with the new Joomla version, it’s time to update your extensions and templates. Doing this after the Joomla upgrade reduces the chances of encountering compatibility issues.
Now that you know how to upgrade Joomla using cPanel, it’s important to regularly check for new Joomla updates to keep your website secure and running efficiently. Joomla’s latest version, Joomla 4, has introduced several new features to enhance your website’s performance and improve the user experience.
Joomla is one of the most used CMS platform, allowing you to customize your website to your exact specifications. But, have you ever wanted to embed a Joomla module directly into an article? Well, you’re in luck. With Joomla’s built-in loadposition plugin, you can easily do this. Let’s dive in!
What is a Joomla Module?
Before we delve into the process, let’s take a moment to understand what a Joomla module is. Modules in Joomla are lightweight and flexible extensions used for page rendering. These modules are often boxes positioned around a component like login, menu, or a custom HTML box.
Step-by-Step Guide: Adding a Joomla Module into an Article
Create a new module instance
Navigate to the ‘Extensions’ tab and select ‘Modules’. Here, click the ‘New’ button to create a new module.
Set a position for your module
In your new module settings, find the ‘Position’ option. Here, you can assign a unique position that doesn’t conflict with your existing module positions. Lets name it my-custom-position.
Enable the loadposition plugin
Now go to ‘Extensions’, > ‘Plugins’. Search for ‘Content – Load Modules’, and ensure it is enabled. If not, click on it and set the status to ‘Enabled’. The loadposition plugin allows you to load a module inside an article.
Insert your module into an article
Open the article where you want to insert your module. In the content area, type {loadposition my-custom-position}. Make sure to replace ‘your-position’ with the position name you set for your module.
Now, your module will appear wherever you’ve placed the {loadposition} tag within your article.
Save your changes
Don’t forget to save your changes both in your module settings and your article.
Viewing Your Joomla Module Inside an Article
Congratulations! You’ve just learned how to insert a module inside a Joomla article. Now, when you view your article on your website, you should see your module displayed in the position you designated.
Remember, adding a module inside an article can be beneficial for displaying extra content or functionality, such as a login form or a custom HTML box. Keep exploring and see what amazing things you can create with Joomla!
Joomla is a powerful and flexible platform, offering features like ecommerce solutions, various extensions, and a robust community for support. Learn more about the benefits of using Joomla on our blog.
Uploading an Excel sheet to a Joomla website involves several steps. Here’s a step-by-step procedure to help you achieve this:
Login to Joomla Administrator Panel:
Navigate to your Joomla website’s admin URL (typically yourwebsite.com/administrator).
Enter your username and password to log in.
Media Manager:
From the top menu, select Content and then click on Media.
This will take you to the Media Manager, where you can manage and upload files.
Upload the Excel File:
Click on the Upload button (usually represented by an upward arrow icon).
Browse your computer to select the Excel file you wish to upload.
Once selected, click on the Start Upload button. Your Excel file will be uploaded to the Joomla server.
Linking the Excel File:
Once the file is uploaded, you can link to it from articles or modules.
Edit or create a new article where you want to place the link.
Highlight the text you want to use as a link.
Click on the Insert/Edit Link button in the editor toolbar.
In the URL field, browse or type the path to the uploaded Excel file. It will typically be in the format: /images/yourfilename.xlsx.
Set the target to “_blank” if you want the file to open in a new window/tab.
Click on Insert to add the link.
Extensions for Advanced Functionality:
If you want to display the Excel content directly on your Joomla site or provide advanced download features, you might consider using Joomla extensions. Extensions like “Edocman” or “Dropfiles” can help manage and display documents, including Excel sheets, more effectively.
Ensure File Security:
Make sure that any sensitive information is removed from the Excel sheet before uploading.
Regularly backup your Joomla site, including the Media Manager files.
Consider using security extensions to protect your uploaded files from unauthorized access.
Test the Upload:
After uploading and linking the Excel file, visit the front end of your Joomla site.
Click on the link you created to ensure the Excel file downloads or displays correctly.
Remember, the exact names of buttons and the layout might vary depending on the Joomla version you’re using and any customizations or extensions you have installed. Always ensure that you’re following best practices for website security when uploading and linking to files.
Save the .htaccess file. We hope the above changes to the htaccess file can help you to remove the index.php from your URL. You can use the above method for any CMS like Joomla, Magento or WordPress.
If you need any help on this then feel free to contact us. Our experienced developers will help you fix the issue.
Migrating a Magento store from a local environment to a live server can be a complex process, but it’s necessary to ensure that your website is accessible to your customers. In this guide, we’ll go through the steps involved in migrating a Magento store from a local environment to a live server.
Step 1: Backup Your Local Store
Before you begin the migration process, it’s important to backup your local store files and database. This ensures that you can easily restore your store if anything goes wrong during the migration process. You can backup your files and database manually.
Step 2: Move Your Files to the Live Server
To move your Magento files to the live server, you can use an FTP client like FileZilla. Connect to your live server and navigate to the root directory where you want to install Magento. Upload all of the files from your local store to the live server using the FTP client.
Step 3: Export Your Local Database
Export your local database in the form of an SQL file. You can do this using phpMyAdmin, a database management tool that’s included with most web hosting plans. Open phpMyAdmin, select your local database, and click on the “Export” tab. Choose the “Quick” export method and click the “Go” button to create an SQL file of your local database.
Step 4: Import Your Local Database to the Live Server
Log in to the cPanel of your live server, open phpMyAdmin, and select the database where you want to import your local database. Click on the “Import” tab, select your SQL file, and click the “Go” button. Wait for the import process to finish.
Step 5: Update Configuration Settings
After you have moved your files and imported your database to the live server, you need to update your Magento configuration settings to reflect the new server. Open the app/etc/env.php file on your live server and update the following settings:
Set the database name, username, and password to match your live server database credentials.
Update the base URL of your Magento store to match the URL of your live server.
Save the changes to the env.php file.
Step 6: Clear Cache and Reindex
After you have updated the configuration settings, you need to clear the cache and reindex your Magento store to ensure that all changes are reflected on the live server. You can do this by logging in to your Magento admin panel and navigating to the “System” menu. Click on “Cache Management” and select “Flush Magento Cache.” Then, click on “Index Management” and reindex all indexes.
Step 7: Test Your Live Store
After you have completed the migration process, you should test your live store to ensure that everything is working properly. Browse your store, place a test order, and check that all features and functionality are working as expected.
By following these steps, you can migrate your Magento store from a local environment to a live server with minimal downtime and disruption to your customers.
Magento is a popular eCommerce platform that is widely used by businesses of all sizes to sell their products and services online. However, with the rise of new eCommerce platforms and the changing needs of businesses, there are now several Magento alternatives available. In this blog post, we’ll take a look at some of the top alternatives to Magento for eCommerce websites.
Shopify
One of the main benefits of Shopify is that it is a fully hosted platform, meaning that you don’t need to worry about setting up and managing your own hosting environment. Shopify also offers a range of plans to suit businesses of all sizes, making it a great option for startups as well as established businesses.
Shopify is one of the most popular eCommerce platforms and is a great alternative to Magento for businesses of all sizes. With Shopify, you can quickly set up an online store, customize your website design, and start selling products online. Shopify also offers a wide range of integrations with third-party apps and tools, making it easy to add new features to your store.
WooCommerce
WooCommerce is a popular eCommerce plugin for WordPress that allows you to turn your WordPress website into a fully functional online store. With WooCommerce, you can easily add products, set up payment gateways, and customize your store’s design.
One of the main benefits of WooCommerce is that it is open source and highly customizable. This means that you have complete control over your online store and can modify it as needed to meet the specific needs of your business. WooCommerce also offers a range of extensions and plugins to add new features to your store.
BigCommerce
BigCommerce is a powerful eCommerce platform that is a great alternative to Magento. With BigCommerce, you can quickly set up an online store, customize your website design, and start selling products online. BigCommerce also offers a range of built-in marketing tools, making it easy to promote your store and drive traffic to your website.
One of the main benefits of BigCommerce is that it is a fully hosted platform, meaning that you don’t need to worry about setting up and managing your own hosting environment. BigCommerce also offers a range of plans to suit businesses of all sizes, making it a great option for startups as well as established businesses.
PrestaShop
PrestaShop is a popular open-source eCommerce platform that is a great alternative to Magento. With PrestaShop, you can quickly set up an online store, customize your website design, and start selling products online. PrestaShop also offers a range of built-in marketing tools, making it easy to promote your store and drive traffic to your website.
One of the main benefits of PrestaShop is that it is open source and highly customizable. This means that you have complete control over your online store and can modify it as needed to meet the specific needs of your business. PrestaShop also offers a range of modules and plugins to add new features to your store.
OpenCart
OpenCart is a lightweight and easy-to-use eCommerce platform that is a great alternative to Magento. With OpenCart, you can quickly set up an online store, customize your website design, and start selling products online. OpenCart also offers a range of built-in marketing tools, making it easy to promote your store and drive traffic to your website.
One of the main benefits of OpenCart is that it is lightweight and fast, meaning that it can handle large amounts of traffic without slowing down your website. OpenCart also offers a range of extensions and plugins to add new features to your store.
Conclusion
Choosing the right eCommerce platform is crucial for the success of your online store. While Magento is a powerful platform, there are now several alternatives available that offer similar or better features and functionalities. Shopify, WooCommerce, BigCommerce, PrestaShop, and Open
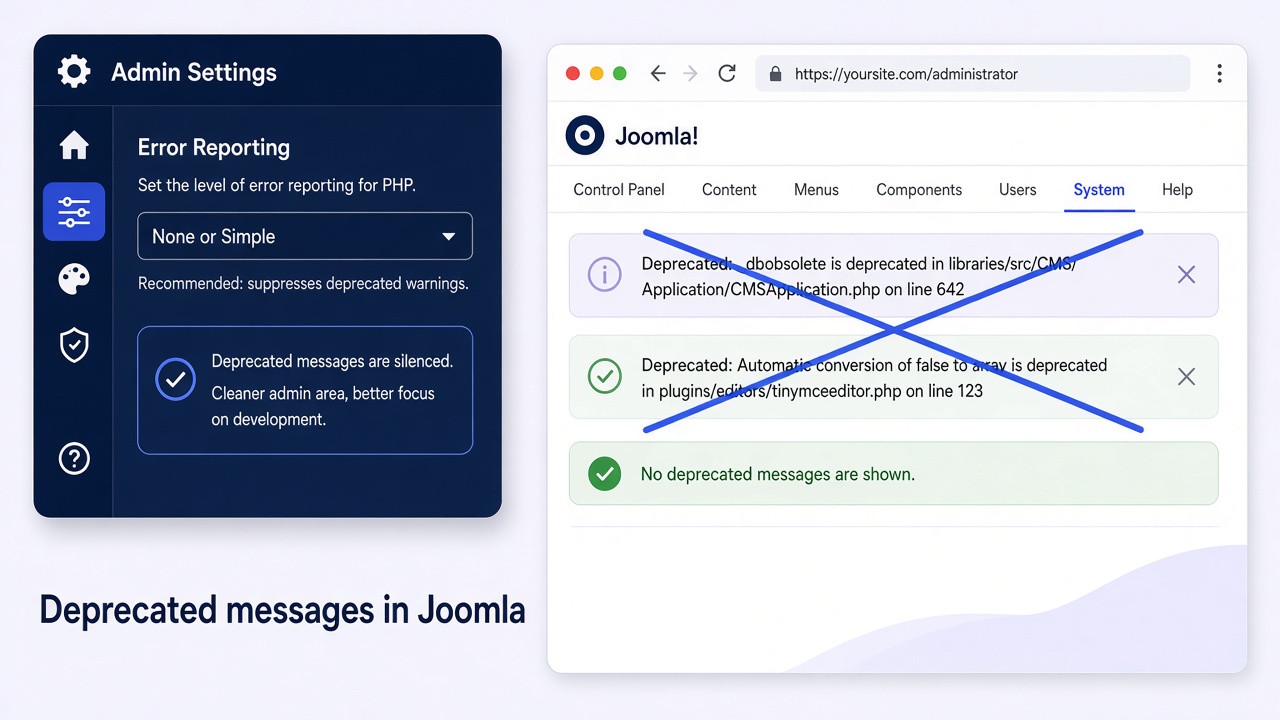
Disabling deprecated Joomla messages means stopping PHP E_DEPRECATED notices (and often Joomla “Log Deprecated API” noise) from flooding the front end, administrator, or log files. On Joomla 4, 5, and 6 the safe first move is Global Configuration → Server → Error Reporting set to None on production (or Simple while you triage), with Debug System off. Hiding messages is not a substitute for updating the extension or template that still calls old APIs.
Thin guides still tell you to paste error_reporting(…) at the bottom of configuration.php. That file is a PHP class of settings, not a free-form bootstrap script, and Joomla already maps Error Reporting into $error_reporting. This guide shows the admin path, the correct DIY edits when the admin is locked, PHP host filters, what Maximum does on PHP 8, and when you should fix the real code instead of silencing it.
What you will learn
What deprecated messages are (PHP vs Joomla API logging)
Production vs staging Error Reporting choices
How to turn off Log Deprecated API and Debug System
DIY: edit $error_reporting in configuration.php when the admin is down
DIY: php.ini / .htaccess filters when System Default inherits a noisy host
Why Maximum + PHP 8 can make a site unusable, and how to recover
When silencing is wrong and you need an upgrade instead
Two different “deprecated” problems
Source
What you see
Control
PHP E_DEPRECATED
Yellow/red notices on the page, or entries in the server error log
Basic errors (roughly errors, warnings, parse). Filters many notices and deprecations
Quick triage without drowning in E_DEPRECATED
Maximum
Forces a very high reporting level (effectively all errors)
Staging only. Can flood PHP 8+ sites with deprecations
Development
Full developer reporting
Local clone only
Security note: production should not display PHP errors to the public. Prefer None for visitors, and read server logs or a staging clone when you need detail.
Step 1: Set Error Reporting in Global Configuration
Log in to Administrator.
System → Global Configuration → Server tab.
Error Reporting: choose None for live sites, or Simple if you still need basic faults visible to admins on staging.
Save & Close.
Reload the front end and administrator. Deprecated banners from PHP display should be gone when None is active.
Step 2: Turn Debug System off on production
System → Global Configuration → System tab.
Debug System: No.
Debug Language: No unless you are translating.
Save.
Debug Mode plus Maximum is how sites become unreadable under PHP 8 when old extensions still emit deprecations.
Step 3: Stop Log Deprecated API filling administrator/logs
System → Global Configuration → Logging tab.
Log Deprecated API: No on production (Yes only while you are intentionally auditing extensions).
Log Almost Everything: No unless you are debugging a specific incident.
Note the Path to Log Folder. If deprecated.php is huge, archive or delete it after you turn logging off (keep a copy if you still need the list of offenders).
Save.
Log Almost Everything does not include the deprecated category. Deprecated API calls use the separate Log Deprecated API switch and write to deprecated.php.
Step 4: DIY when the administrator is locked
If deprecated output or a fatals storm blocks the admin UI, edit configuration.php over SFTP or hosting File Manager. Change permissions temporarily if the file is read-only (often 444 → 644 on Linux hosts), edit, then lock it down again.
Set the property Joomla already understands. Do not append a free-standing error_reporting(…) call at the bottom of the class file:
public $error_reporting = 'none';
public $debug = false;
Useful values for $error_reporting: 'none', 'simple', 'maximum', 'development', or 'default' (system default). Matching debug:
public $debug = false;
Optional logging flags you may also see in the same file:
public $log_everything = 0;
public $log_deprecated = 0;
Save the file, reload the site, then finish the job in Global Configuration once the admin is reachable again.
Some deprecations fire so early that only the PHP process setting fully hides them. Prefer the host panel (MultiPHP INI, PHP-FPM pool, or “Select PHP version → Options”).
Example php.ini / FPM style:
display_errors = Off
error_reporting = E_ALL & ~E_DEPRECATED & ~E_STRICT
log_errors = On
On Apache with AllowOverride permitting PHP flags, some hosts accept:
php_value error_reporting 22527
(22527 is a common integer for E_ALL & ~E_DEPRECATED on older PHP lines. Confirm with echo E_ALL ^ E_DEPRECATED; on your PHP version, or use the host UI instead of guessing.)
If Global Configuration is set to Maximum, Joomla overrides the host filter for display. Switch Maximum off first, then tune PHP.
Step 6: Verify and keep staging honest
Production: Error Reporting None, Debug No, Log Deprecated API No.
Staging clone: temporarily use Simple or Development, or enable Log Deprecated API, and capture which extensions appear in the log.
Confirm visitors no longer see notice HTML in View Source.
Confirm the server error log is not still spamming the same deprecations every request (display off does not always stop logging).
Clear Joomla cache after config changes.
What not to do
Do not paste error_reporting(E_ALL & ~E_DEPRECATED); at the bottom of configuration.php. That old Infyways tip (and many Stack Overflow clones) treats a settings class like index.php.
Do not leave Maximum + Debug on a public PHP 8 site “just in case.”
Do not error_reporting(0) in core index.php as your long-term strategy. Updates overwrite it and you lose real fatals you need.
Do not ignore a flood of deprecations forever on an abandoned extension. PHP 8.3 / 8.4 and Joomla 6 will keep raising the cost.
Fix the cause when messages point at your stack
Signal
Likely cause
Next step
Deprecations name a third-party extension path
Extension not ready for your PHP / Joomla line
Update or replace the extension
Deprecations name a template override
Old PHP in the override
Rewrite the override on a child template
Only on Maximum / Development
Expected noise while modernising
Keep production on None; fix on staging
Site unusable after a PHP upgrade
Reporting too high + legacy code
Set None/Simple via configuration.php, then plan an upgrade
If the site is still on Joomla 3 or early 4 with abandoned extensions, silencing notices only buys time. Infyways upgrades start at $149 with a free audit within 12 hours: Joomla Upgrade Services.
What thinner articles leave out
Topic
Typical post
This guide
First step
Hack configuration.php with error_reporting()
Global Configuration Error Reporting
Joomla API log
Ignored
Log Deprecated API and deprecated.php
PHP 8 + Maximum
Missing
Why the site can go blank or unusable
Locked admin
Vague FTP advice
Edit $error_reporting and $debug properties correctly
Host PHP
One .htaccess line
display_errors, logging, and Maximum override behaviour
Root cause
“Messages are annoying”
Update extensions or upgrade the CMS
Key takeaways
Production: Error Reporting None, Debug System No, Log Deprecated API No.
Simple is a useful middle ground for triage without full deprecation spam.
Avoid Maximum on live PHP 8+ sites unless you are ready for noise.
When locked out, set $error_reporting = 'none'; and $debug = false; in configuration.php.
Do not append raw error_reporting() calls to configuration.php.
Host PHP filters help when System Default inherits a noisy ini, but Maximum overrides them for display.
Silencing is temporary. Fix or replace the extension that still uses deprecated APIs.
Frequently asked questions
How do I disable deprecated Joomla messages?
Set Global Configuration → Server → Error Reporting to None on production, turn Debug System off, and set Log Deprecated API to No.
What is the difference between Error Reporting None and Simple?
None hides PHP error display. Simple still shows basic errors and warnings but filters much of the notice and deprecation noise.
Why did Maximum make my PHP 8 site unusable?
Maximum forces very high reporting, so every E_DEPRECATED from legacy extensions can dump onto every page. Switch back to None or Simple.
How do I edit Error Reporting if the administrator will not load?
Edit configuration.php and set public $error_reporting = ‘none’; and public $debug = false; then reload.
Should I add error_reporting() to configuration.php?
No. Use the $error_reporting property or the Global Configuration UI. Appending a free-standing call is an outdated and brittle hack.
What does Log Deprecated API do?
It writes Joomla deprecated API usage to deprecated.php in the log folder. Turn it on only while auditing, then turn it off.
Will hiding deprecated messages fix security issues?
No. It only stops display or API logging. Outdated extensions can still be vulnerable. Plan updates or a migration.
Can I filter E_DEPRECATED in php.ini only?
Yes for System Default, and for some compile-time cases. If Joomla Error Reporting is Maximum, change that setting too.
Where do we start if deprecations come from abandoned extensions?
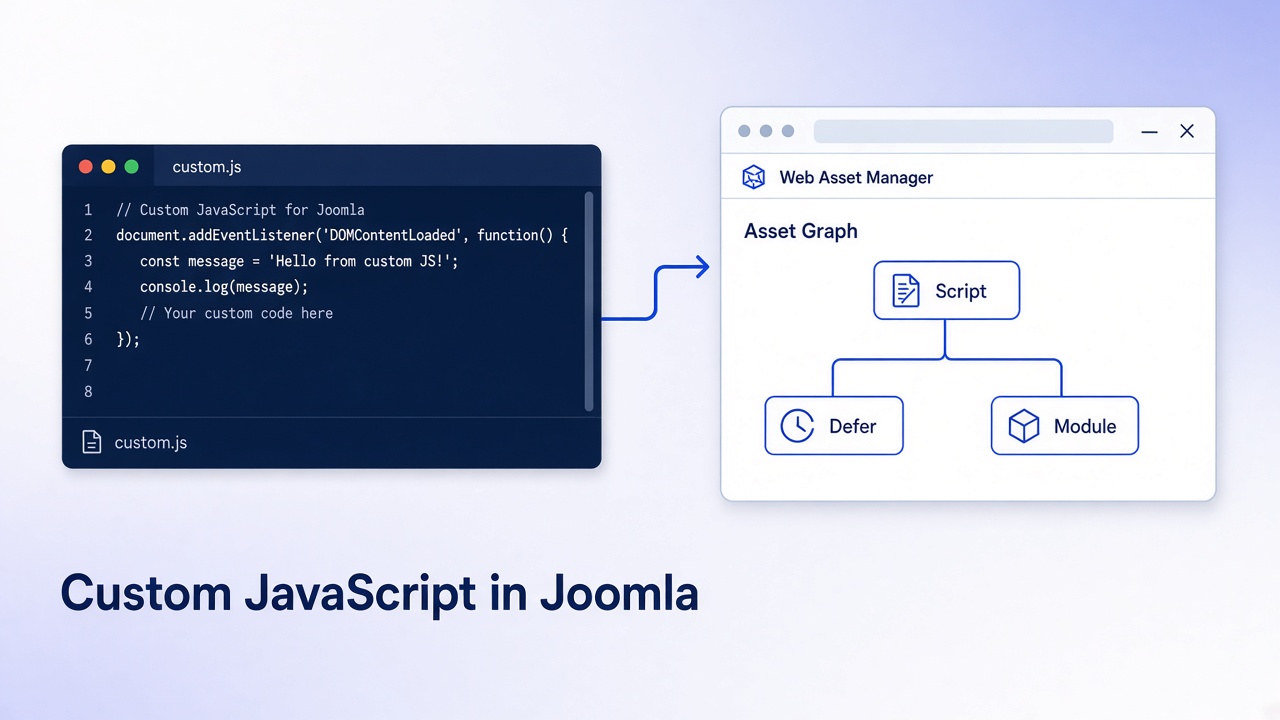
Adding custom JavaScript to Joomla means loading your own .js files, CDN scripts, or trusted inline snippets on the public site without breaking the template on every update. On Joomla 4, 5, and 6 the modern stack is the Web Asset Manager. Site owners who want an admin UI can use Easy Includes by JoomlaX. Developers who prefer files in the theme can do the same job with a child template, joomla.asset.json, and a few lines of PHP. This guide covers both.
Old posts still paste raw <script> tags into Cassiopeia, hard-code CDN URLs in the head, or call deprecated Document::addScript. Those patterns fight updates and duplicate libraries. Use Easy Includes when you do not want to touch PHP. Use the DIY Web Asset Manager path when the script belongs to the template or a single override. The same guide shows how to remove custom JavaScript cleanly when you outgrow a snippet.
What you will learn
When to choose Easy Includes by JoomlaX vs a child template DIY path
Exact Easy Includes setup for files, CDN, defer/async, SRI, and exclusions
DIY: joomla.asset.json, useScript, registerAndUseScript, and inline scripts
How to remove custom JavaScript again (plugin rows, template assets, leftover hard-coded tags)
How to pass PHP options and language strings into JavaScript
Where tracking scripts belong (after cookie consent)
Parent template updates overwrite index.php and media you edited in place
Hard-coded tags skip dependency ordering and can load jQuery or core twice
Document::addScript / addStyleSheet are deprecated in favour of Web Asset Manager
Tracking in the head often runs before visitors can Reject non-essential cookies
Article HTML <script> blocks are stripped by many editors and are hard to audit
Path A: Easy Includes by JoomlaX (no template edits)
Easy Includes 2.0 is a JoomlaX system plugin for Joomla 4, 5, and 6. It keeps custom CSS and JavaScript in plugin settings: site-relative files, CDN URLs, or trusted inline blocks. Each row can be enabled or disabled. Scripts register through Web Asset Manager with Normal, Defer, or Async loading, plus ES module, nomodule, crossorigin, and SRI options. Cache busting (Off, Auto, Aggressive) and exclusions for user groups, components, and URL fragments keep checkout and login clean.
Step 1: Install and enable Easy Includes
Download from the JED listing or your JoomlaX account.
System → Install → Extensions → upload the package.
System → Manage → Plugins → System – Easy Includes.
Enable the plugin. Leave administrator loading off unless you need admin assets.
System → Clear Cache.
Step 2: Add a JavaScript file or CDN URL
Upload your file under a stable path (for example media/templates/site/cassiopeia/js/site.js).
Open Easy Includes and add a JavaScript file row.
Path: site-relative such as media/templates/site/cassiopeia/js/site.js, or a full https:// CDN URL. Do not use .. traversal.
Choose Normal, Defer, or Async. Prefer Defer for non-critical UI behaviour.
Add SRI integrity and crossorigin when the file comes from a CDN you hash yourself.
Enable the row, save, and clear cache.
Step 3: Inline JavaScript only when you must
Inline JS is trusted administrator input. Use it for tiny fixes, not large libraries. Prefer a file on disk for version control.
Keep snippets short with a comment naming the purpose
Do not paste secrets or unreviewed third-party blobs
Turn Debug logging on while testing exclusions, then off on production
Step 4: Exclude pages that must stay clean
Exclude
Example
Why
URL fragment
/checkout, /cart
Avoid JS that breaks payment or cart flows
Component
com_users
Keep login and reset pages minimal
User group
Staff or special front-end groups
Limit experimental scripts by audience
Step 5: Verify Easy Includes in the browser
Open the front end as a guest. DevTools → Network → JS.
Confirm your file loads once with the expected defer/async behaviour.
Confirm excluded URLs do not load it.
After editing a local file, use Auto cache busting once, then return to Off on stable production if you prefer clean URLs.
Use this when you own the template (or a child template) and want the script in Git next to the theme. Work on a child of Cassiopeia or your commercial template so parent updates do not wipe the files.
Step 6: Create the JS file in template media
Create or open your child template.
Add a file such as media/templates/site/YOUR_CHILD/js/custom.js (replace YOUR_CHILD with the child folder name).
Templates ship a joomla.asset.json. Add a script entry. For template media, the uri is often just the filename under the template’s js folder (Cassiopeia style). Example asset item:
Bump version when you change the file so browsers fetch a fresh copy. If both custom.js and custom.min.js exist, Debug mode can prefer the non-minified file as documented in the manual.
For a CDN library, set uri to the full https:// URL and list it as a dependency of your own script asset.
Step 8: Enable the script in template PHP
In the child template index.php (near other Web Asset Manager calls):
Confirm the template still includes Joomla’s scripts output (the usual jdoc:include for scripts). Do not paste a raw <script src="…"> tag in the head for the same file.
Step 9: DIY for one view only
When only one override needs the script, register and use it from that tmpl file instead of loading it sitewide:
Adjust the uri to match where you stored the file under media/ or the path style your template expects. Prefer a joomla.asset.json name when the asset is reused in many places.
Language strings: Text::script('COM_EXAMPLE_LABEL') in PHP, then Joomla.Text._('COM_EXAMPLE_LABEL') in JS. Details: Adding JavaScript.
How to remove custom JavaScript from Joomla
Removing is the mirror of adding. Disable or delete the registration first, then delete the file, then clear every cache layer. If you only delete the .js file while the asset is still enabled, the browser shows a 404 and can break other scripts that depend on it.
Step 11: Remove scripts added with Easy Includes
System → Manage → Plugins → System – Easy Includes.
To pause a script without losing the row: turn that file or inline row off, save, clear cache, and verify Network no longer loads it.
To remove it for good: delete the row (or clear the path / inline code), save, and clear cache.
Optional: delete the physical file from media/… or your CDN upload once nothing references it.
If you are retiring Easy Includes entirely: disable the plugin, confirm the front end, then System → Manage → Extensions to uninstall when you are sure.
Uninstalling the plugin removes the loader. It does not always delete files you uploaded elsewhere on disk. Remove those yourself if you no longer need them.
Step 12: Remove DIY template or override scripts
Child template sitewide asset: remove or comment out $wa->useScript('template.custom'); in index.php.
Remove the matching object from joomla.asset.json (or leave the file but stop calling useScript).
One-view DIY: delete the registerAndUseScript / addInlineScript / addScriptOptions block from the override tmpl.
Delete custom.js (and custom.min.js if present) from the template media folder when nothing else needs them.
System → Clear Cache. Purge CDN / page cache. Hard-refresh DevTools with Disable cache checked and confirm the URL is gone.
Step 13: Hunt leftover hard-coded tags
Old sites often have scripts in more than one place. After you remove the modern registration, search for leftovers:
Parent or child index.php raw <script src="…"> tags
Template “Custom code” / head / footer fields in template options
Other system plugins that inject head scripts
Article or module HTML that still contains pasted <script> blocks
Consent module script slots (GA and ads belong there; remove or move them deliberately)
Symptom after a remove
Likely cause
Fix
404 for custom.js
Asset still registered, file deleted
Disable Easy Includes row or remove useScript / asset.json entry
Script still loads
Second copy in template or another plugin
Search Network initiator and remove the other source
Old file after edit
Browser, Joomla, or CDN cache
Bump asset version, clear all caches, hard refresh
Checkout broken after uninstall
Unrelated; or you removed a required shop script
Restore from backup; only remove scripts you added
Custom JavaScript vs cookie consent
Marketing and analytics tags are still JavaScript, but they are not a design asset. Put them in a consent-aware slot so Reject all prevents them from running. Easy Includes is for UI and site behaviour you control. Easy Cookie Alert (or your CMP) owns GA, ads, and similar tags.
Disable registration, then delete file, then clear caches and hunt duplicates
When the platform is the real problem
If the site is stuck on Joomla 3 with a club template full of inline scripts, adding more JS will not fix Core Web Vitals or security. Upgrade first, then add assets cleanly. Infyways migrations start at $149 with a free audit within 12 hours: Joomla Upgrade Services.
Key takeaways
Use Web Asset Manager on Joomla 4, 5, and 6. Stop deprecated addScript habits.
One view only: registerAndUseScript in the override.
Prefer files on disk over large inline blocks.
Defer non-critical scripts. Bump asset version after edits.
Put analytics behind consent, not in the template head.
To remove: disable the Easy Includes row or useScript call first, then delete the file, then clear caches and check for hard-coded duplicates.
Clear Joomla cache (and CDN/page cache) after every change.
Frequently asked questions
How do I add custom JavaScript to Joomla without editing the template?
Use Easy Includes by JoomlaX: enable the plugin, add a file or CDN row, choose Defer when appropriate, save, and clear cache.
How do I add custom JavaScript with DIY Web Asset Manager?
Put the file in child template media, declare it in joomla.asset.json, call useScript in the template PHP, and clear cache.
What is the Web Asset Manager?
It is Joomla’s system for registering and loading CSS/JS with names, dependencies, and attributes so extensions do not step on each other.
Should I still use Document::addScript?
No for new work. Use useScript, registerScript, or registerAndUseScript instead.
Can I add JavaScript to a single Joomla article?
Avoid pasting scripts into article HTML. Prefer a menu-assigned module, an override with registerAndUseScript, or Easy Includes exclusions aimed at that page.
What is the difference between Defer and Async?
Defer runs after HTML parsing and keeps order relative to other deferred scripts. Async runs when ready and may reorder. Prefer Defer for most site UI scripts.
Yes. Easy Includes 2.0 supports Joomla 4, 5, and 6 with Web Asset Manager registration.
How do I stop my script on checkout pages?
With Easy Includes, use exclusions for the checkout URL or shop component. With DIY template assets, load the script only from overrides that are not the checkout view.
How do I remove custom JavaScript from Joomla?
Disable or delete the Easy Includes row, or remove the useScript / registerAndUseScript call and the joomla.asset.json entry, delete the file if unused, then clear Joomla and CDN caches and confirm in Network.
Why do I still see the script after I deleted the file?
Something is still registering it, or a cached HTML/CDN copy remains. Remove the registration, purge caches, and search for a second hard-coded tag.
Where do we start if the template is full of hard-coded scripts?